
Making Persona Renders in Blender (A basic tutorial) 🧵

💥💥💥💥💥💥💥💥💥💥💥
When opening Blender 4.2, you’ll be greeted with a screen similar to this. Click anywhere in the viewport or click the General button to start.

It is recommended to get the CATS plugin for Blender 4.2 (https://cats.neoneko.xyz/). After the zip is downloaded, install it in Blender by going to Edit > Preferences > Add-ons > Install from Disk.

Now, to import our models, typically, the Persona dancing models are split into hair, face, and body components. That being said, go to File > Import > FBX and repeat until all three parts are imported.

After removing the default cube and using Makoto Yuki in this case, hold down the Z key and move your mouse to the material preview. Then, release the Z key to display the texture rather than a flat solid view.

The model will appear as white or similar due to the presence of the outline mesh. Typically, the outline mesh is retained to maintain the anime aesthetic, but it can be deleted otherwise.
Assuming the outline will be kept, go to materials, change the surface to emission, and change the colour to black. Additionally, enable backface culling for the camera and shadows. Repeat this process for the remaining outline meshes.
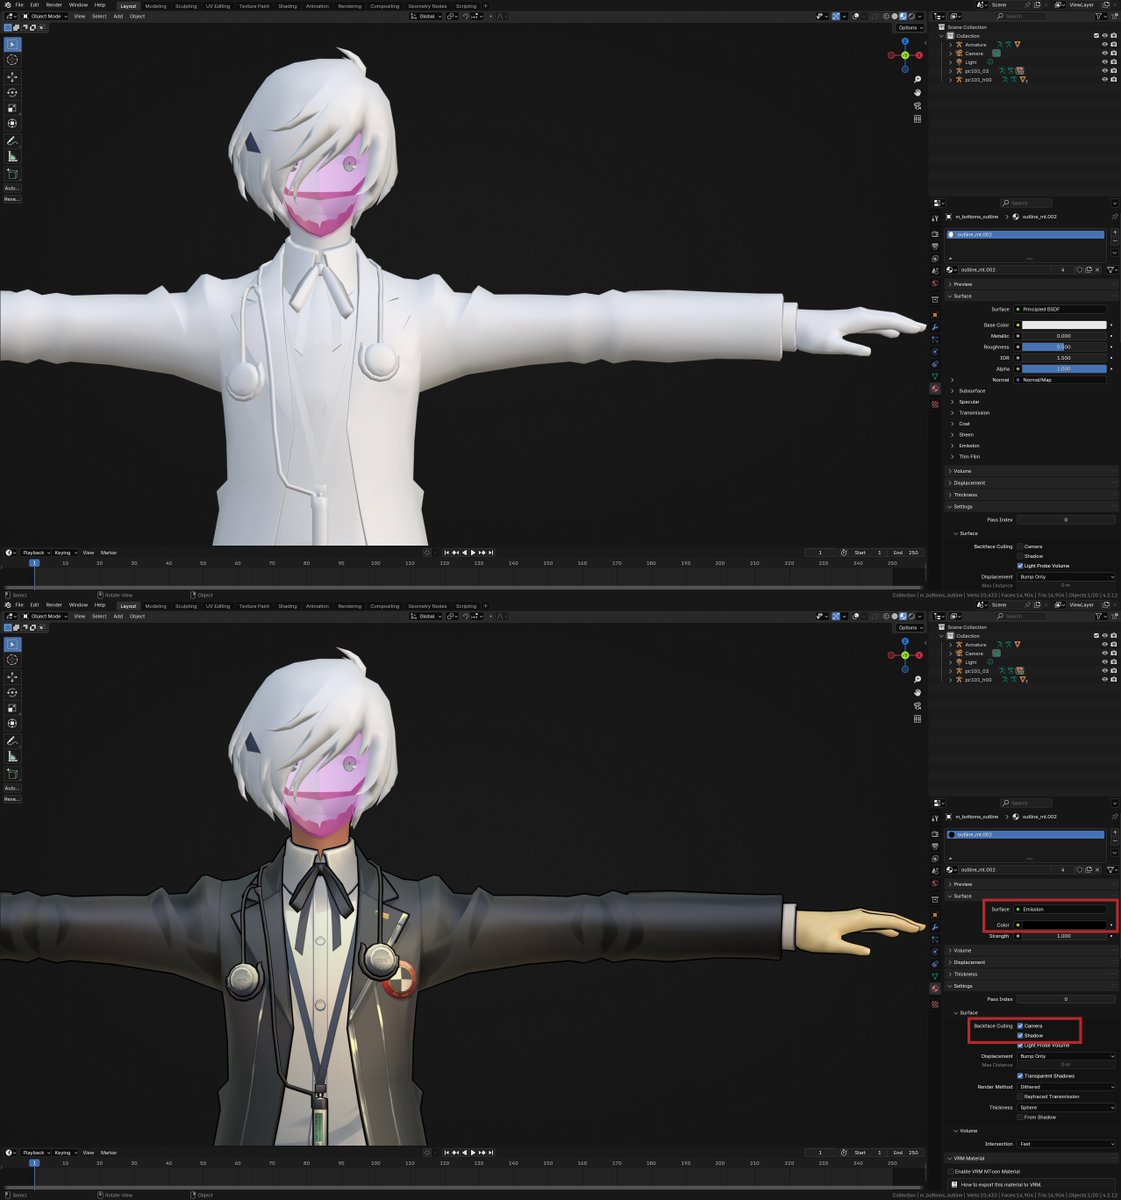
If a model appears to be pink, as shown below, that means a texture is missing. If you have the texture on hand, then reopen it from the same material tab. Anyways, Principled BSDF is not typically used for anime art due to its realistic lighting; we will modify the shading.

Navigating to the Shading tab, we will see the Node Editor at the bottom. If available, you can use custom node groups or create a shader; however, for simplicity sake, using the image to the material output is also acceptable for now.

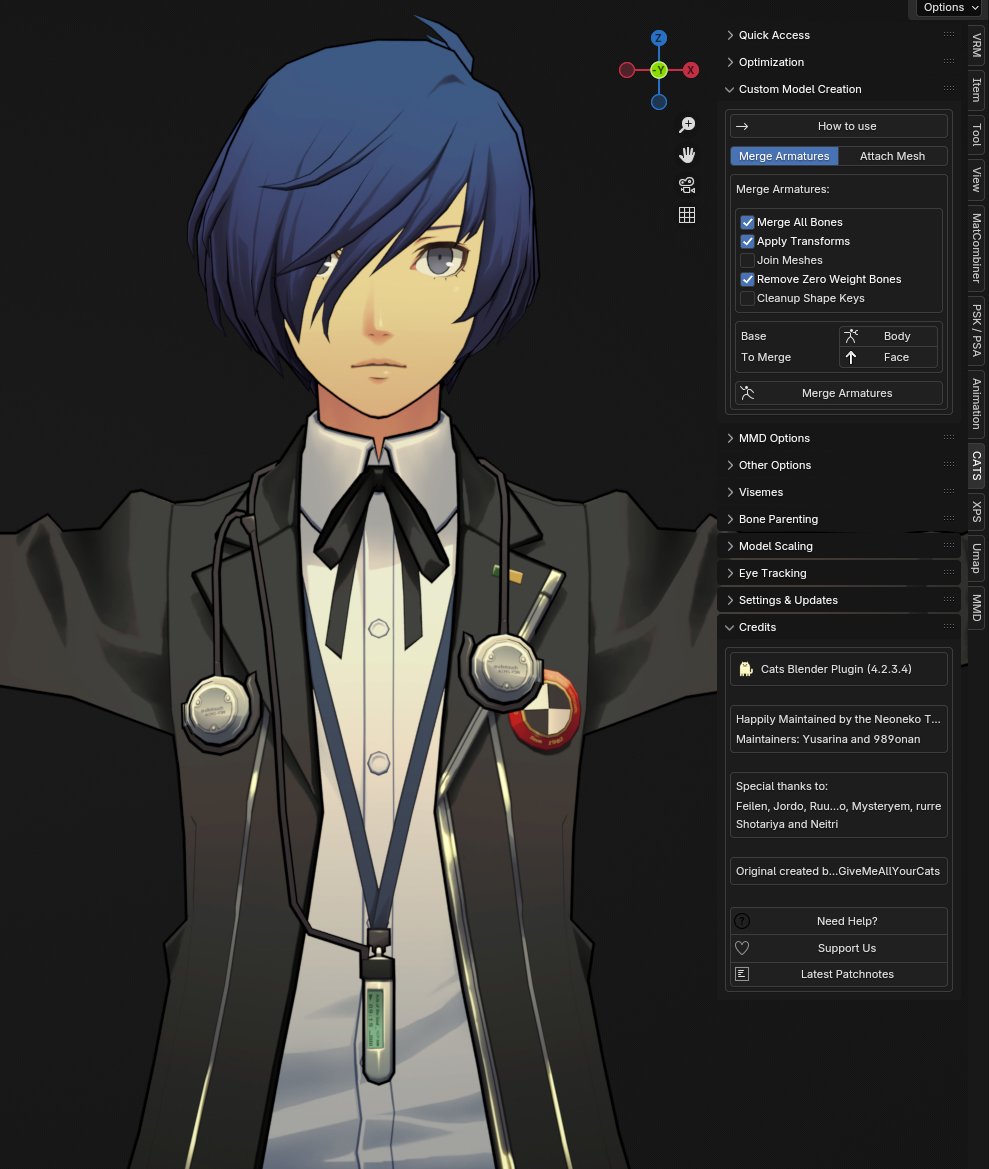
Back to the Layout tab. We will merge the three parts. Click N in the viewport to show the sidebar tabs, and go to CATS. We will go to Custom Model Creation and select the options shown below. Merging the face to the body, then with the hair, is the best
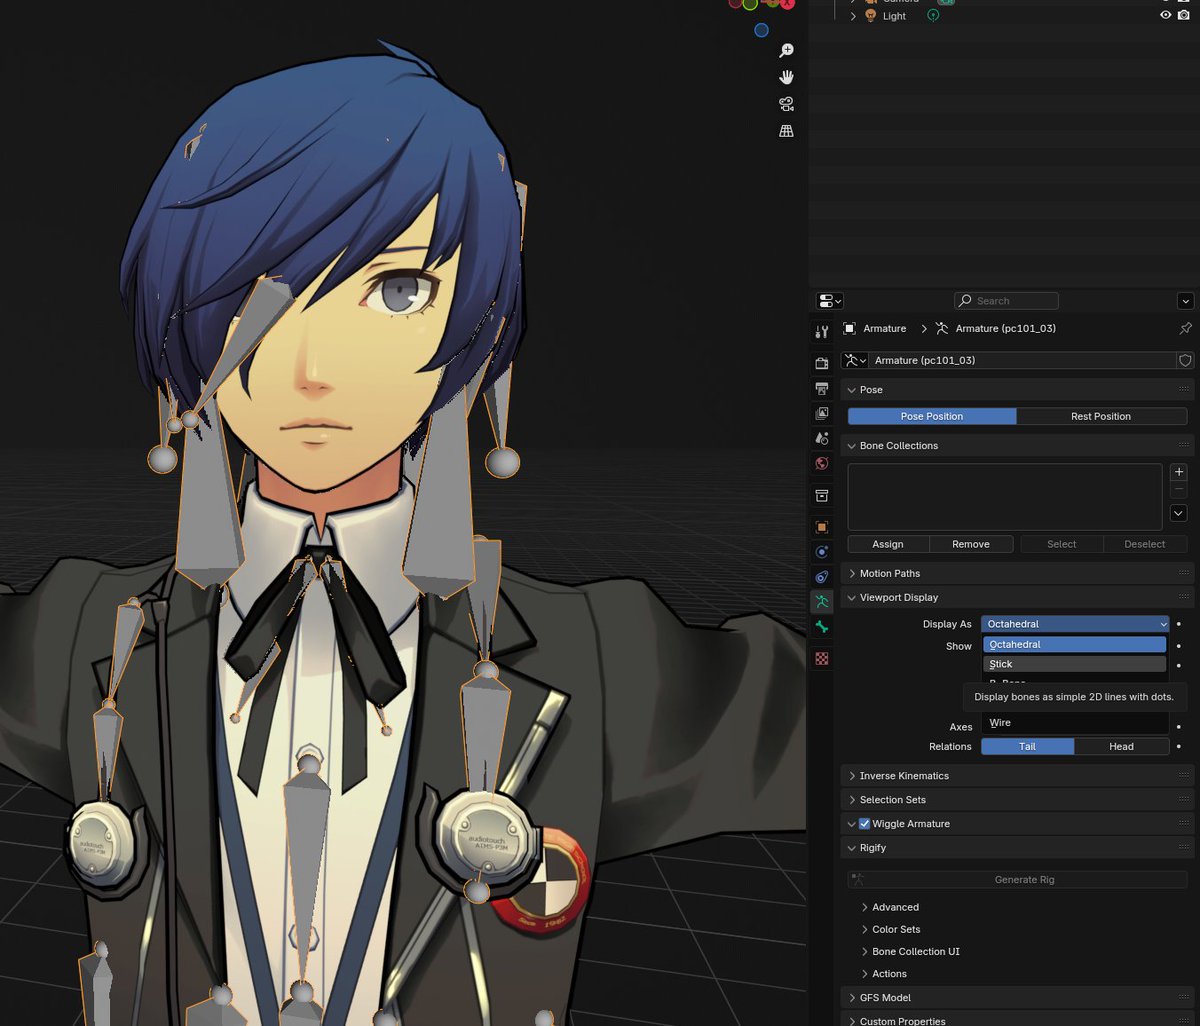
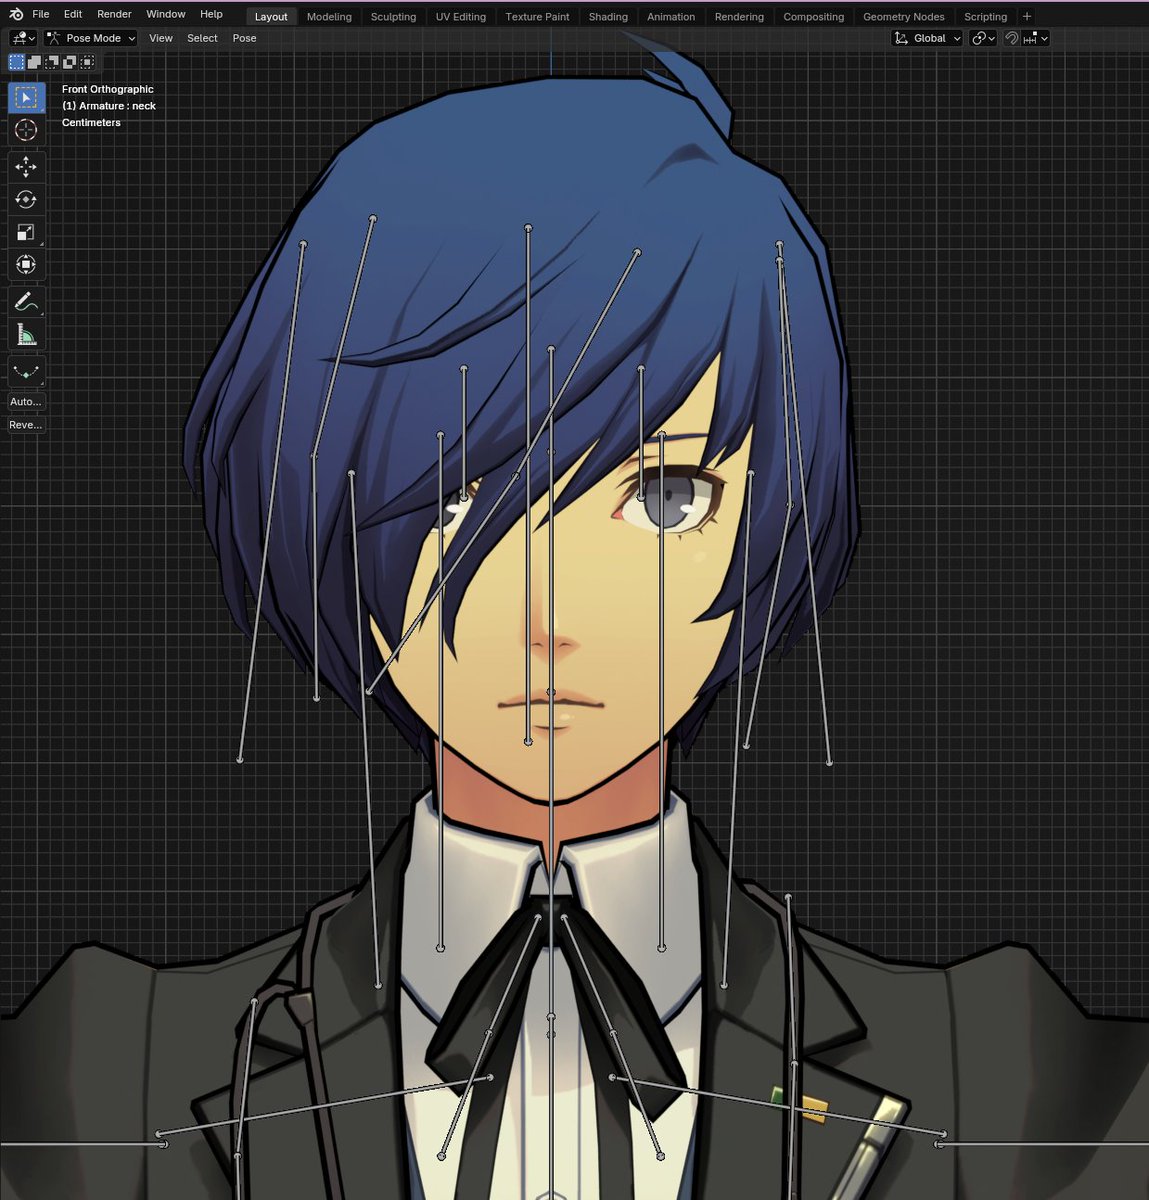
After merging, there is some housekeeping before posing. Ideally, you would want to change the bone display from octahedral to stick to make it less cluttered when posing.
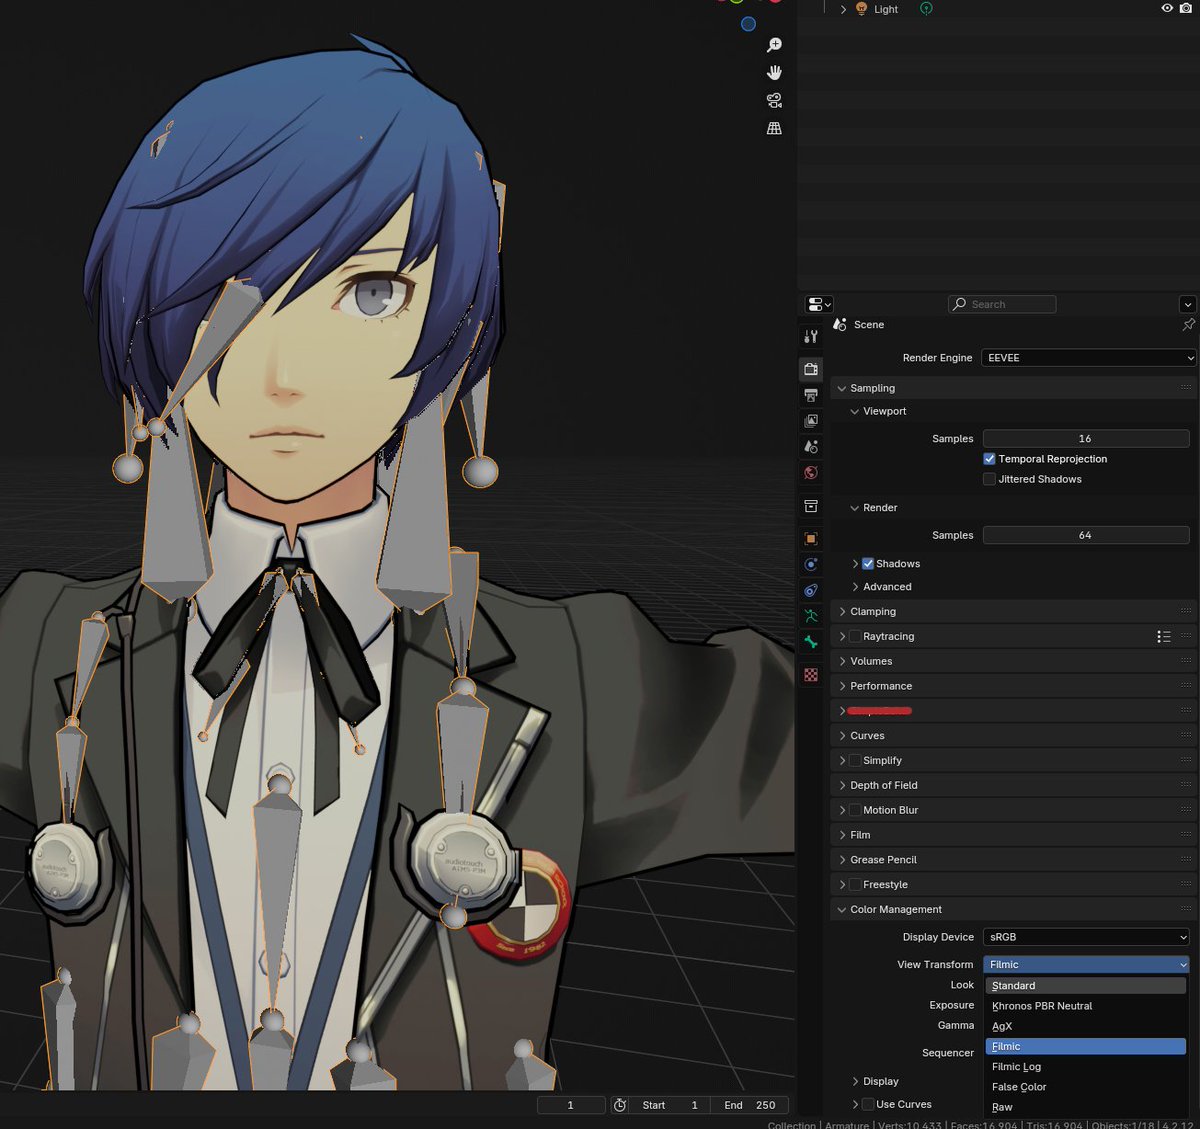
Additionally, by default, the view transform is set to filmic (which I had already disabled), making the model appear dull. It is recommended to change it to Standard to make the model look more vivid. However, it is all a matter of personal preference.
Now, click on the armature and change it from Object Mode to Pose Mode. This will show a view similar to the second photo; if needed, click Alt + Z to enable/disable X-ray mode.

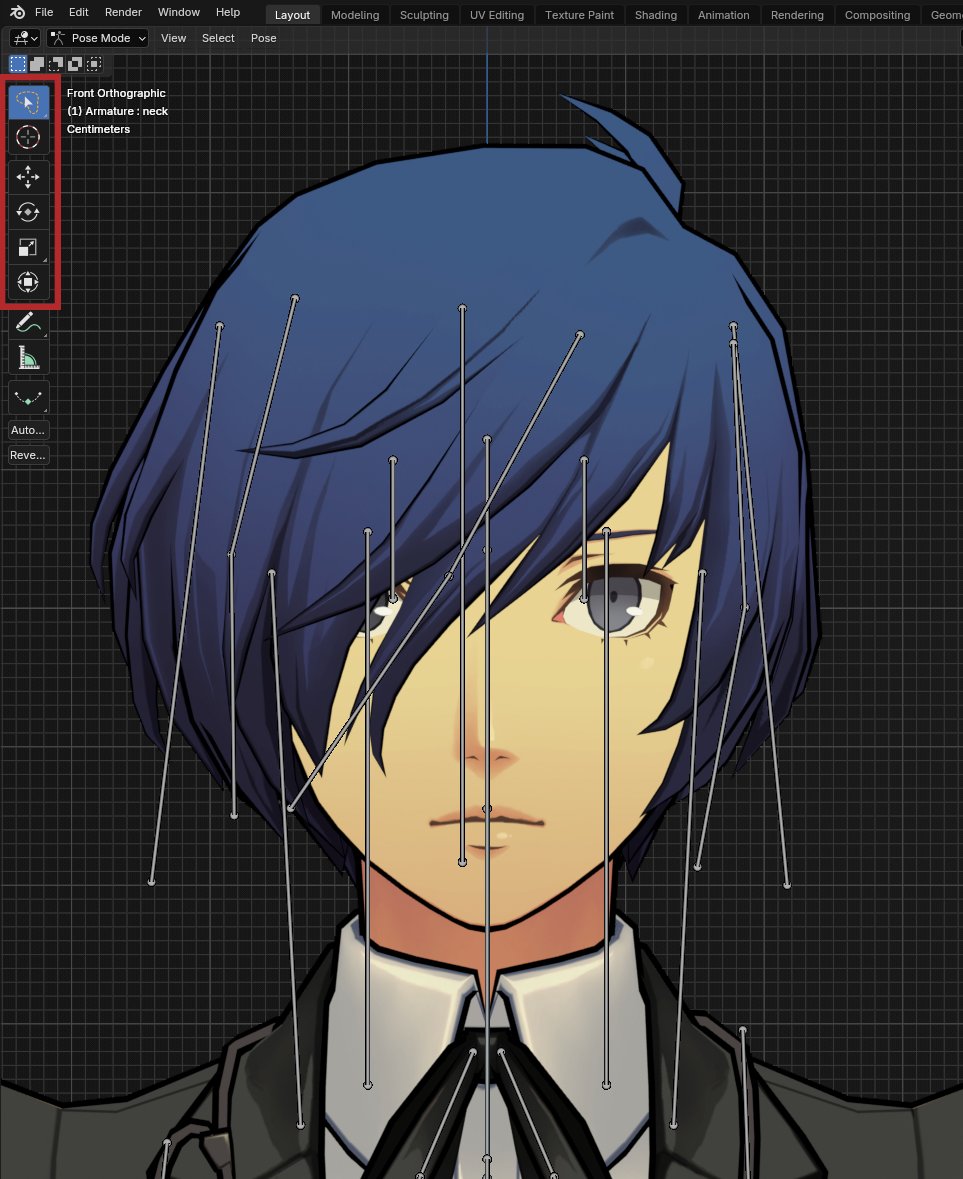
For posing, it’s typically recommended to use the Gizmos, which is the toolkit shown on the left side. The rotate gizmo is the most common tool for posing.
Sometimes, the head bones may not merge correctly as shown. To fix this, first click the head bone from the face, then click the bone from the body as shown, then in CATS, Merge bone to Active.


So now using the rotate tool, just adjust the bones to move the body around to create a pose you desire. Like this random pose I made

We need to change the facial expression of the model, assuming it doesn’t have face bones. Go to the shapekeys tab and adjust the facial expressions as needed by using the 0-1 value slider.

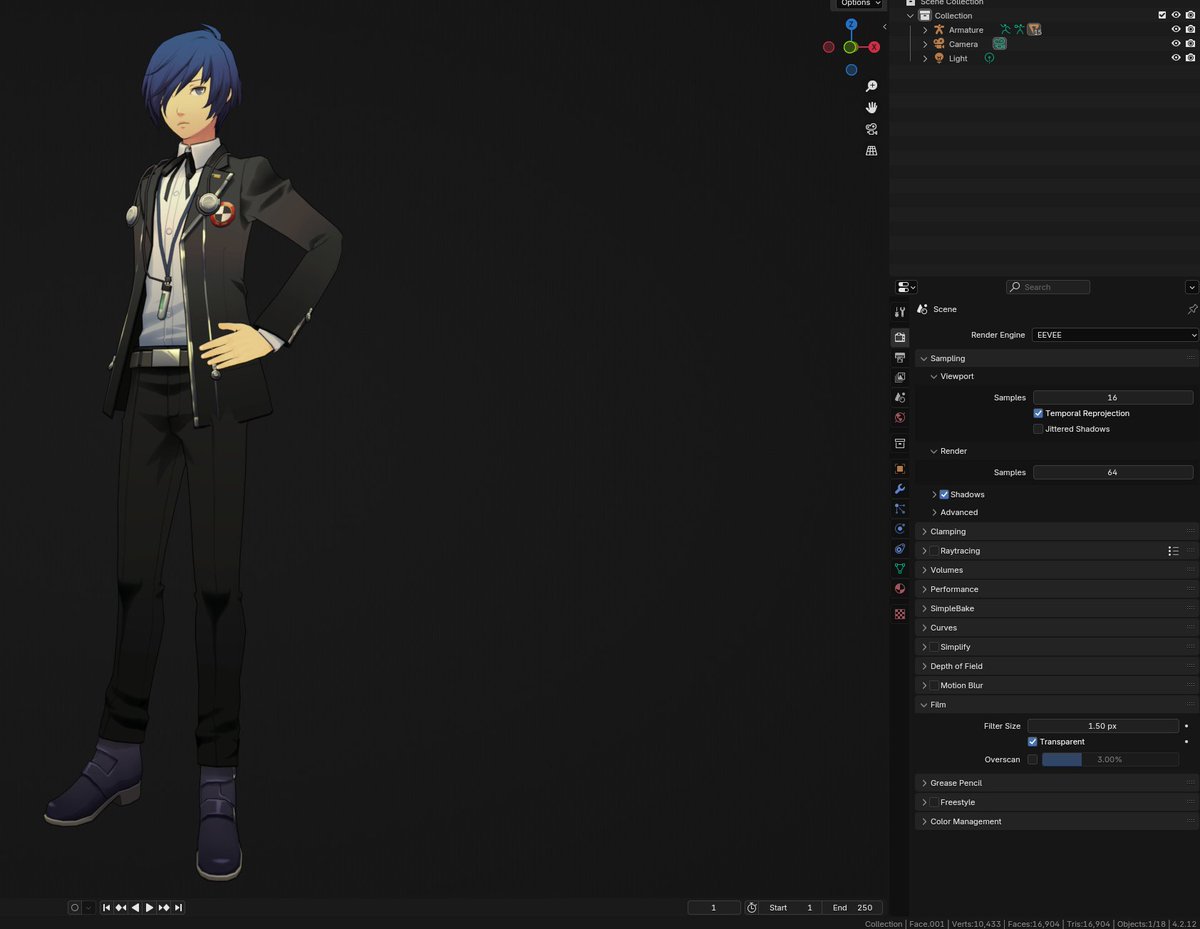
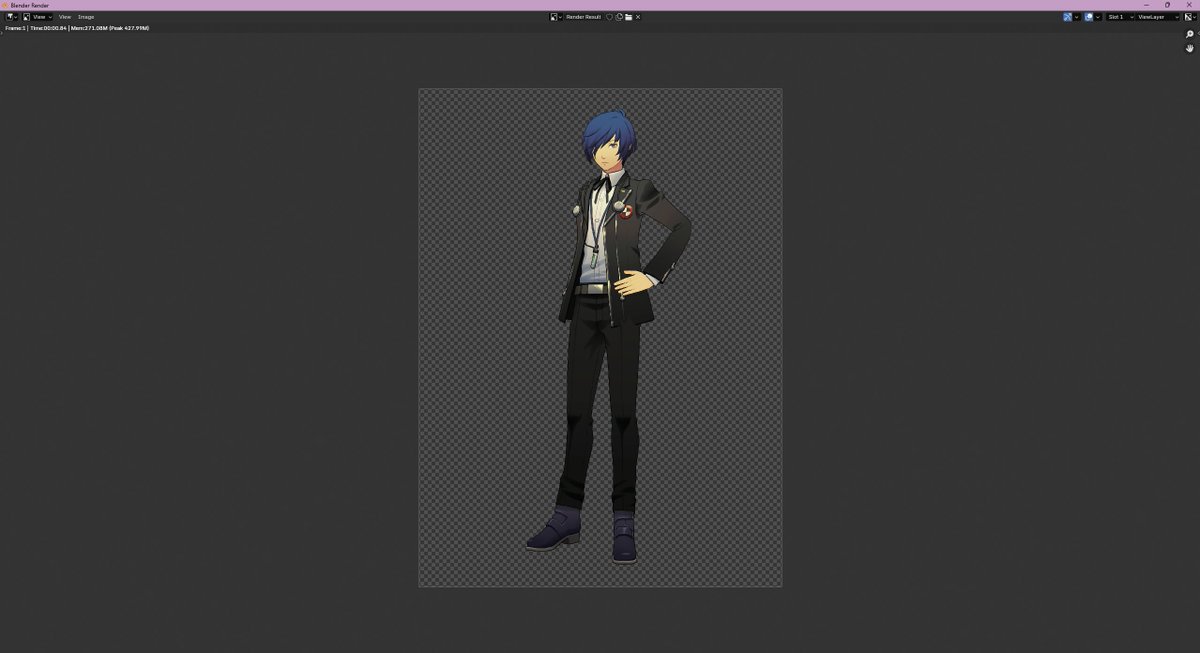
After completing the pose, it is time to setup camera for the render. If needed, enable the transparent check box, as shown in the screenshot, to make the render's background transparent.
Now, return to Object Mode from Pose Mode, and then move the camera using the same Gizmos used in Pose Mode. NUMPAD 0 can be used to go into the camera’s POV. The resolution can also be changed as shown.

The camera’s settings can also be changed if the camera is selected, as shown below. Then, click F12 to render the camera’s view, and it will show a picture as shown in the second image. The image shown can be saved to the computer as a full-resolution image.

And other than post editing, that’s it! That’s the gist of how to make a Persona render. If you encounter any unusual issues, my DMs or strawpage are also open to questions, though only quick and minor questions pls 😭 Hope this helps anyone interested!
@no1yukarifan FINALLY A BLENDER TUTORIAL THAN DOESNT MAKE ME WANT K*LL MYSELF!!!!! i really really appreciate this!
@no1yukarifan Time to try it at some point, gah I wish it would just warp into my Brain🙃

@no1yukarifan Bookmarking THIS for later