
Day 4/30 of mastering the market and dropping value ‼🔥 Valid Supply & Demand Zones📈📉 Unlocking the hidden powers of Supply and demand levels 💯🔥 Let’s break it down ⬇️ A thread 🧵
Before we proceed kindly repost, like and comment so others can benefit 🥺🙏 join my Telegram for more insights ⬇️ https://t.me/The_kingsmantradi...
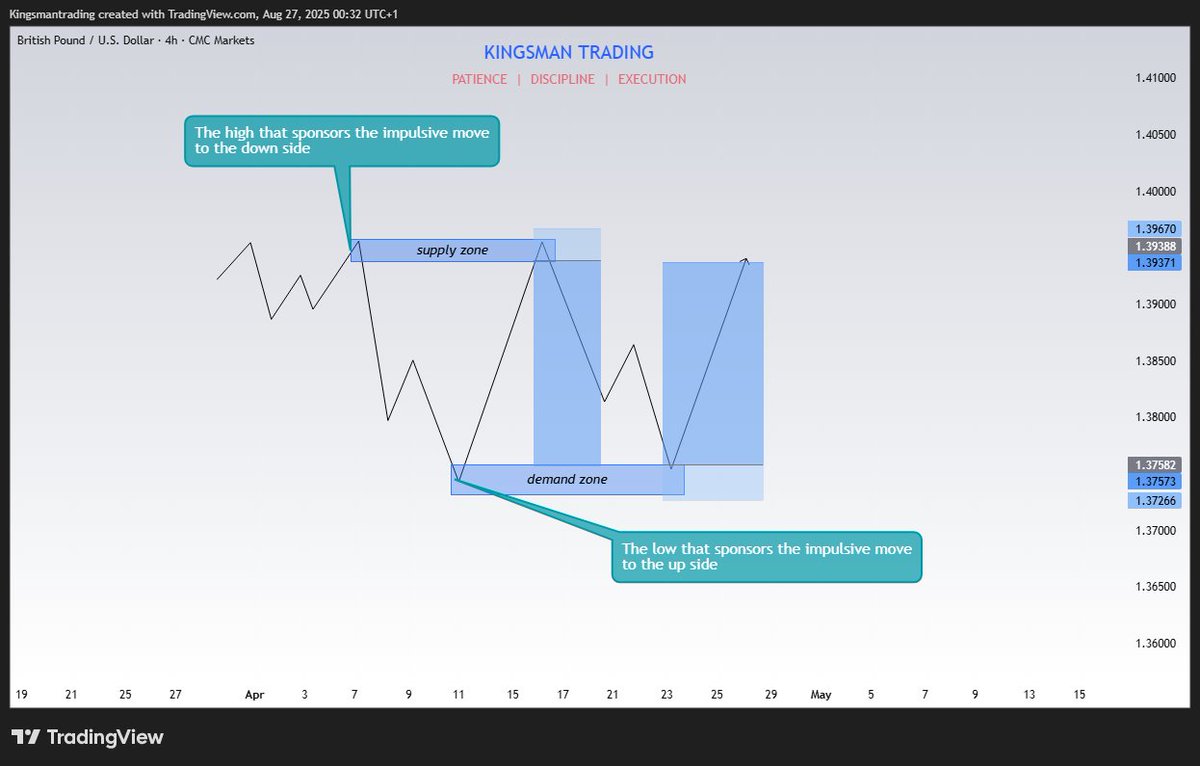
Supply & Demand zones are levels where buying or selling pressure is concentrated, causing impulsive price moves. These zones are significant because when price revisits them, it often reacts by grabbing pending orders.
1. What are Supply & Demand Zones? Demand Zone (Bullish OB): Last down candle before a strong bullish move (buyers stepped in). Supply Zone (Bearish OB): Last up candle before a strong bearish move (sellers took control). This zone show where institutions place orders 💰

2. How to Identify Them? Look for a strong impulsive move after a candle/zone. Mark the last opposite candle before the move. That’s your OB zone. Wait for price to return → look for confirmation entry. A supply zone when invalidated can also be used as a Demand Zone
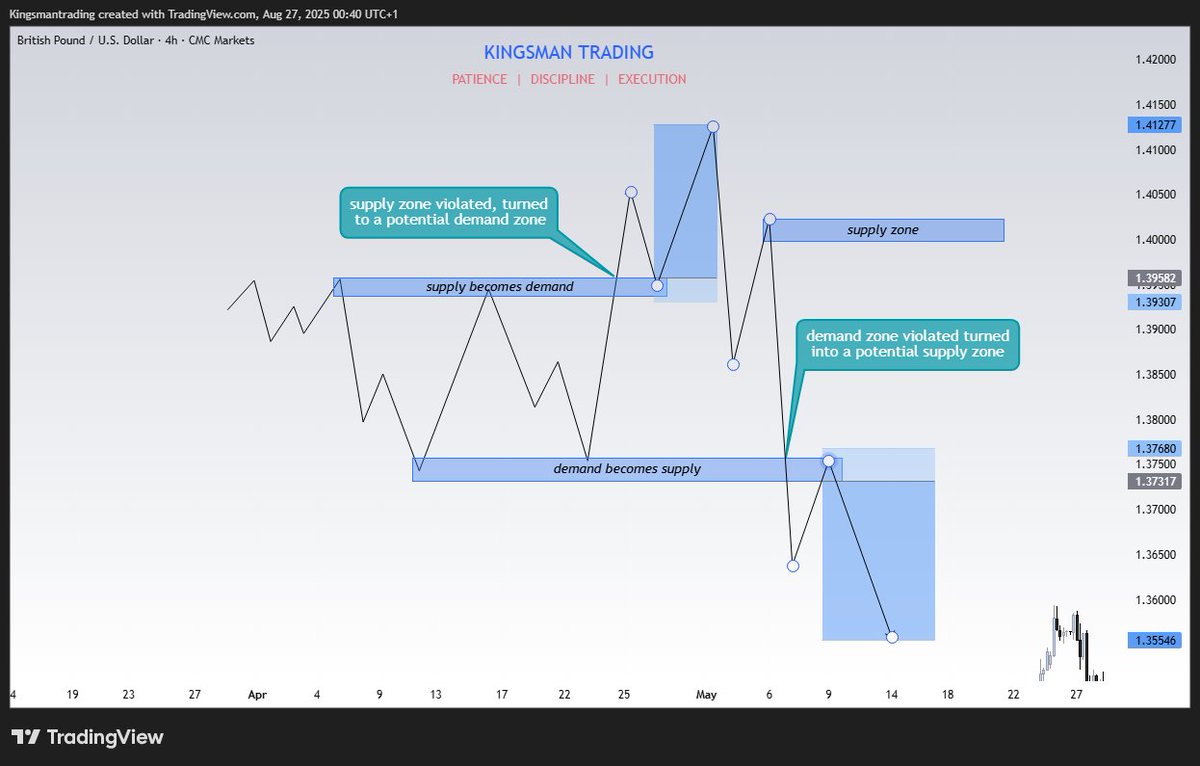
3. Simple Example: Price consolidates. One last red candle → then a massive bullish push. That red candle = Bullish Order Block (Demand Zone). When price returns → it’s a high-probability long entry.

Bonus Tip: Not all OBs are valid. The strongest ones are usually aligned with: Market Structure (BOS/Shift) Presence of liquidity before those levels Liquidity Sweeps Higher Timeframe POIs That’s how you filter the noise. The end... don't forget to follow ✅🙏
@Thekingsmann_ @sammie_poundz @Techriztm @Big_giz4L @BIG__EFE @Diceyy1z @iam_viiktor Thank you for sharing
@Adextea99 @sammie_poundz @Techriztm @Big_giz4L @BIG__EFE @Diceyy1z @iam_viiktor My pleasure 🙏
@Thekingsmann_ @sammie_poundz @Techriztm @Big_giz4L @BIG__EFE @Diceyy1z @iam_viiktor Very detailed thread sir 👍
@Thekingsmann_ @Techriztm @Big_giz4L @BIG__EFE @Diceyy1z @iam_viiktor Very insightful...
@Thekingsmann_ @sammie_poundz @Techriztm @Big_giz4L @BIG__EFE @Diceyy1z @iam_viiktor Well detailed 👌 ✅
@Thekingsmann_ @sammie_poundz @Techriztm @Big_giz4L @BIG__EFE @Diceyy1z @iam_viiktor Another day down💯